How do I adjust my Apple watch band?
Adjusting an Apple Watch band is a straightforward task that can significantly enhance your wearing comfort and ensure a perfect fit for your wrist. Whether you’ve just unboxed a new Apple Watch or are looking to adjust an existing band, understanding the correct procedure is key. This task can generally be accomplished with ease, regardless of the band type you have.
Steps to Adjust Your Apple Watch Band
Before you begin, it’s important to identify the type of band you have, as the adjustment method may vary. Apple offers a variety of band styles, including the Sport Band, Milanese Loop, and Link Bracelet. Each has a unique adjustment mechanism.
- Sport Band: Look for the pin-and-tuck closure. Gently press the button on the pin, slide the band to adjust its length, and then secure it by tucking the end of the band into the slot that best fits your wrist.
- Milanese Loop: The adjustment is rather simple, thanks to its magnetic clasp. Just gently lift the clasp and slide it along the band to tighten or loosen the fit.
- Link Bracelet: To adjust this type of band, you’ll need to use a simple tool provided by Apple to add or remove links for a perfect fit.
Remember, when adjusting your Apple Watch band, the goal is to achieve a snug, yet comfortable fit that doesn’t pinch your skin or slide too freely. Always adjust your band on a flat surface to avoid accidental drops or damage to your watch. With these tips, you should be able to adjust your Apple Watch band with confidence and ease.
How to adjust watch band clasp?
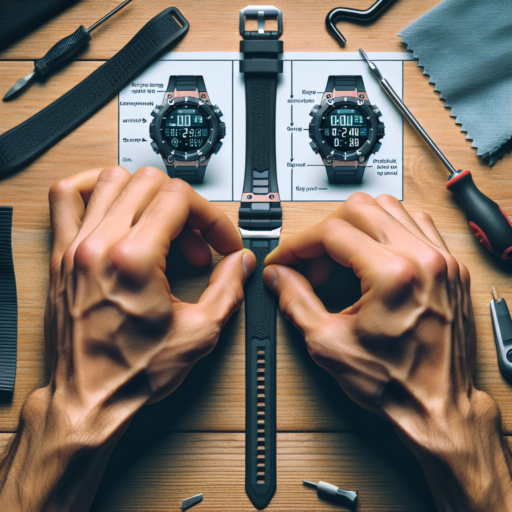
Adjusting the clasp of a watch band is a straightforward task that can significantly enhance your watch’s comfort and fit. Whether you have just purchased a new watch or your current watch doesn’t fit as well as it used to, adjusting the band can make all the difference. This guide will walk you through the necessary steps to adjust a watch band clasp efficiently.
Firstly, identify the type of clasp your watch has. The most common types are fold-over, push-button, and slide-adjusting clasps. Fold-over clasps are commonly found in metal watch bands and are adjusted by removing or adding links. Push-button clasps have small buttons on either side that, when pressed, allow for the band to be adjusted or opened. Slide-adjusting clasps can often be adjusted without the need for any tools; they simply slide along the band to the desired position. Knowing the type of clasp will dictate the tools required and the adjustment method.
For many adjustments, especially with fold-over clasps, a small screwdriver or a pin removal tool will be necessary. Exercise caution to avoid damaging the clasp or band. Place the watch band on a soft cloth or pad to protect the watch face, and carefully work on the clasp, following specific instructions for your clasp type. If you’re adding or removing links, make sure to keep them in case future adjustments are needed. Pay close attention to the clasp mechanism as you reassemble it to ensure it functions correctly once adjusted.
How to shorten watch band links?
Shortening the links of a watch band can be a straightforward process once you know the right steps to take. Whether you’ve just purchased a new watch that’s a bit too large for your wrist or you’re looking to make an old favorite fit perfectly again, adjusting the band is a simple way to enhance comfort and ensure your watch stays securely in place. In this guide, we’ll walk through the essential steps to remove links from your watch band, offering both clarity and practical advice to accomplish this task with ease.
Identifying the Type of Watch Band
Before you begin the process of shortening your watch band links, it’s crucial to identify the type of band you are working with. The most common types include pin type, screwed type, and snap-out types. Each of these categories requires a slightly different approach when removing links. Understanding your watch band’s specific mechanism will not only save you time but also prevent potential damage to your watch.
Required Tools for Removing Watch Links
Gathering the right tools is a pivotal first step in the link removal process. For most watch bands, you will need a small hammer, a pin pusher or a watch link remover tool, and a pair of fine-nosed pliers. Some links are secured with tiny screws, necessitating the use of precision screwdrivers. Ensuring you have the correct equipment for your watch’s link type is essential for a successful adjustment.
By following these initial steps, you are well on your way to customizing the fit of your watch band. Remember, while the task may seem daunting at first, with a little patience and the right tools, shortening your watch band links can be a simple, rewarding DIY project. Keep in mind, however, that if at any point the process feels overwhelming, consulting with a professional jeweler or watch repair specialist is always a smart move to prevent accidental damage.
No se han encontrado productos.
How to make an apple band smaller?
Making your Apple band smaller is a straightforward process that ensures your watch fits perfectly on your wrist, enhancing both comfort and the device’s sensor accuracy. Whether you’re dealing with a sport loop, leather loop, or Milanese loop, understanding the right adjustment method can make a significant difference. This article will guide you through the necessary steps to adjust the size of your Apple band optimally.
Adjusting a Sport Loop or Leather Loop
For adjustable bands like the sport or leather loops, the process involves a simple repositioning of the band closure. Begin by gently pulling the adjustable portion of the band to loosen it. Once you have slackened it enough, you can then slide the band’s adjustable end to tighten or loosen the fit. Ensure that the fit is snug but comfortable on your wrist, allowing for skin breathability and optimal sensor function. It’s crucial to evenly adjust both sides to maintain balance and comfort.
Resizing a Milanese Loop
Resizing a Milanese Loop requires a slightly different approach due to its unique design. First, hold the band so the magnetic closure is in your dominant hand. Then, gently lift the magnetic clasp to unlock the loop. Slide the clasp along the band until you find the perfect fit for your wrist. Once adjusted, secure the clasp back in place. The key here is to ensure the band sits comfortably around your wrist without being too tight or too loose, which could affect the watch’s functionality.
Adjusting an Apple band to make it smaller improves wearability and ensures the technology works as intended. While the steps are straightforward, taking care to adjust your band properly can enhance the overall experience of using your Apple Watch. Always remember to handle the bands with care, especially when making adjustments, to avoid any damage to the band or the watch itself.