Understanding the Basics of Detaching a Watch Band
Detaching a watch band might seem like a daunting task at first glance, but with the right knowledge and tools, it can be a straightforward and rewarding process. This essential skill not only allows you to adjust the fit of your watch but also makes it possible to customize your timepiece with different bands to match your style.
Identifying the Type of Watch Band
Before attempting to detach your watch band, it’s crucial to identify what type of band you’re working with. The most common types include spring bar, screw-in, and pin-style bands. Each type requires a slightly different approach for detachment. For instance, spring bar tools are necessary for spring bar straps, while a small screwdriver fits best for screw-in types.
Tools You Need for Detachment
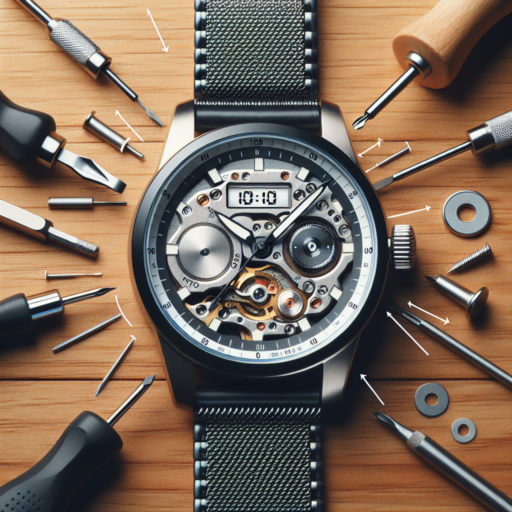
Having the right tools at your disposal can greatly simplify the process. A basic watch repair kit often includes all you might need: a spring bar tool, a small screwdriver, and perhaps a case opening tool for watch backs. It’s important to use tools specifically designed for watch repair to avoid damaging your timepiece. Gentle, precise motions are key.
Understanding the basics of detaching a watch band is the first step in taking greater control over the personalization and maintenance of your timepiece. Whether you’re looking to swap out bands for aesthetic reasons or to replace an old, worn-out strap, knowing how to properly detach the band is essential.
Tools You’ll Need to Remove or Replace Your Watch Strap
When it comes to personalizing your watch or ensuring it fits perfectly, replacing the watch strap is a common practice. However, doing so requires specific tools to prevent damage to your beloved timepiece. Understanding the essential tools will make the task smoother and safeguard the integrity of your watch. Below is a detailed list of the necessary equipment every watch enthusiast should have on hand.
Spring Bar Tool
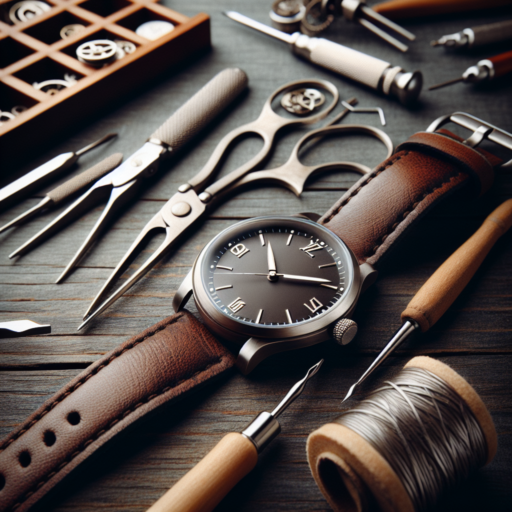
The cornerstone of watch strap replacement tools is the spring bar tool. This versatile instrument is designed for the precise task of removing and inserting the spring bars that hold your watch strap in place. One end of the tool typically features a forked tip to grip the spring bar, while the other may have a point or a smaller fork, providing versatility for different watch models. A good quality spring bar tool not only makes the removal process easier but also significantly reduces the risk of scratching your watch case.
Watch Case Holder
While not always necessary, a watch case holder can be incredibly beneficial, especially for those new to watch maintenance. This tool stabilizes your watch, providing a secure base to work on. It minimizes slippage, offering a better grip and access to the watch straps. Whether you’re dealing with a delicate vintage piece or a robust modern watch, securing it in a case holder can prevent accidental drops or movement, ensuring a safer strap removal or installation process.
Microfiber Cloth and Tweezers
In the world of watch care, the details matter. Therefore, having a microfiber cloth by your side is crucial. It’s not just for polishing your watch post-maintenance; it’s equally important for creating a clean workspace. Dust or debris can easily scratch your watch during the strap-changing process, so ensure your working area and the watch itself are spotless. Additionally, a pair of precision tweezers can be invaluable for handling and positioning the tiny spring bars and ensuring they snap securely into place.
Step-by-Step Guide: How to Easily Detach Any Watch Band
Detaching a watch band might seem daunting, but with the right technique, it can be a straightforward and hassle-free process. Whether you’re looking to replace a worn-out strap, or simply want to switch up your style, our step-by-step guide is designed to help you easily detach any watch band. By following these simple steps, you’ll be able to safely and effectively remove your watch band without the need for professional help.
Prepare Your Tools and Workspace
Before you begin, it’s crucial to have the right tools on hand. For most watch bands, a small screwdriver or a spring bar tool will be necessary. Make sure to work over a soft surface or a watch cushion to prevent any damage or scratches to your watch. A magnifying glass might also be helpful to see the tiny parts clearly. This initial step is essential in ensuring a damage-free detachment process.
Identify the Detachment Mechanism
Watch bands are attached using various mechanisms, such as spring bars, screws, or pins. Carefully examining your watch will help you understand the type of mechanism you’re dealing with. For spring bars, you will find them located between the watch lugs. If screws are used, they will be visible on the sides of the lugs. Recognizing the correct detachment method is crucial to avoid damaging your watch or the band.
Once you’ve identified the mechanism, use the appropriate tool to gently push or unscrew the bar or pin. For spring bar types, gently push the tool against the spring bar’s end until it compresses, allowing you to ease the band away from the lug. If it’s a screw type, carefully unscrew each side with a suitable screwdriver. Remember, patience and a steady hand are your best tools throughout this process.
No se han encontrado productos.
Tips for Detaching Watch Bands Without Damaging Your Watch
Detaching a watch band might seem like a straightforward task, but doing it incorrectly can lead to damage to your beloved timepiece. Whether you’re looking to swap out your band for a new look or performing a thorough cleaning, it’s crucial to proceed with caution. Here, we share essential tips to ensure your watch remains in pristine condition during the process.
Using the Right Tools
One of the cardinal rules when detaching a watch band is to use the appropriate tools. A dedicated watch band pin removal tool or a spring bar tool is indispensable. These tools are specifically designed to fit into the tiny spaces of watch lugs and safely compress the spring bars without scratching the surface of your watch. Attempting to use makeshift tools like knives or paperclips often results in unwanted scratches or other damages.
Work on a Soft Surface
Before you begin the process of detaching your watch band, make sure you’re working on a soft surface. Laying down a microfiber cloth or a watchmaker’s mat can significantly reduce the risk of your watch getting scratched or scuffed if it accidentally slips from your hands. This simple precaution safeguards not only the crystal and body of the watch but the band itself.
Following these tips can make the difference between a successful band change and an unfortunate damage incident. Using the proper tools and preparing your workspace can help keep your watch in top condition, allowing you to enjoy the versatility of interchangeable bands without the worry.
Watch Band Types and Their Specific Detachment Methods
When it comes to personalizing watches, knowing the different watch band types and their specific detachment methods can significantly expand your styling options. Each band type not only offers a unique look and feel but also comes with its own set of tools and techniques for removal. Understanding these can help ensure you switch bands safely without damaging your watch or the band itself.
One common type that many watch enthusiasts start with is the traditional spring bar band. These bands are held in place by a spring-loaded bar that fits into notches on the watch case. The key to detaching this type of band involves using a spring bar tool to compress the bar, allowing you to slide the band out of place. This method requires a bit of precision to avoid scratching your watch.
Another popular option is the magnetic mesh band. These bands offer a seamless and adjustable fit, utilizing a magnetic clasper to secure the band around the wrist. Detachment is notably simpler here; gently pulling apart the magnetic ends or sliding the magnetic buckle off the mesh band does the trick. No tools are required, making this type ideal for quick and easy adjustments.
For those who favor durability and a secure fit, the screw-in link bracelet is a formidable choice. These bands use small screws to hold each link in place, offering a robust construction. Detaching a screw-in link bracelet involves using a tiny screwdriver to loosen and remove the screws on the band links you wish to detach. Although this method is more time-consuming, it provides a high level of adjustability and security for the wearer.
Troubleshooting Common Issues When Removing Watch Straps
Removing watch straps might seem straightforward, but it can sometimes be fraught with challenges that can leave you baffled. Understanding these common issues and knowing how to address them can save you time and prevent potential damage to your watch.
Dealing with Stuck Spring Bars
One of the most common issues encountered when removing watch straps is dealing with stuck spring bars. Over time, dust, dirt, and corrosion can cause the spring bars to become lodged tightly within the lug holes. Using a spring bar tool with a pointed tip can help leverage the bar out. Apply gentle pressure and wiggle the tool slightly to loosen the spring bar without causing scratches to your watch.
Strap Pins That Don’t Align
Another challenge is when the pins of the strap do not align with the holes in the watch case. This might happen due to the wrong size of strap pins or wear and tear deforming the holes. Ensuring that you have the correct size and type of pins for your watch strap is critical. If the holes seem distorted, you may need to carefully widen them using a precision tool, ensuring not to enlarge them too much.
Managing Leather Strap Stiffness
Leather straps, in particular, can become stiff over time, making them difficult to remove without causing damage. Gently bending and rolling the strap between your fingers can help make it more pliable. Applying a small amount of leather conditioner can also restore some of its flexibility, making the removal process easier and helping to avoid tearing or other damage.
Caring for Your Watch and Band After Detachment
When you detach your watch from its band, it’s crucial to give both components the care they need to maintain their aesthetics and functionality. Over time, dirt, sweat, and bacteria can accumulate, potentially harming the materials of your watch and band. Thankfully, with some simple steps, you can keep your timepiece and its accessories in top condition.
First, consider the material of both your watch and band. Different materials require different care methods. For instance, a stainless steel watch band can often be cleaned with a soft, damp cloth and mild soap, while leather bands need a specialized cleaner to prevent damage. Always dry your watch and band thoroughly after cleaning to prevent moisture from causing damage or irritation when worn.
Maintenance is key in extending the life of your watch and band. Regular checks for signs of wear or damage can help you address issues before they worsen. For metal bands, look for links that may need tightening, and for leather, watch for signs of cracking or dryness. This proactive approach will not only keep your watch looking great but also ensure it functions well for years to come.
How to Choose the Right Replacement Band for Your Watch
Selecting the perfect replacement band for your watch involves more than just picking a style you like; it’s about matching your watch with your personal lifestyle and ensuring the longevity and comfort of your watch-wearing experience. There are several factors to consider when choosing the right watch band, from the material to the band width, and even the style and functionality it offers.
Consider the Material
One of the first steps in selecting a replacement band is to think about the material. Each material has its unique benefits and drawbacks. Leather bands offer a classic look that ages beautifully over time, making them ideal for traditional and vintage watches. Silicone and rubber bands are perfect for athletic individuals or those looking for water-resistant options. Metal bands, such as stainless steel, titanium, or gold, provide durability and a sleek, professional appearance. Nylon and fabric bands offer comfort and a casual look, suitable for daily wear.
Measure the Band Width
Ensuring the correct band width is crucial for the fit and appearance on your wrist. The band width is typically measured in millimeters (mm) and should correspond exactly to the lug width of your watch to ensure a proper fit. An incorrectly sized band can result in a poor fit, affecting both comfort and the aesthetics of your watch. Most watch manufacturers provide this information in the product specifications, or you can measure it yourself with a ruler.
Match Your Lifestyle and Fashion Style
Your replacement watch band should not only fit well but also complement your personal style and lifestyle. For those in professional or formal settings, a metal or high-quality leather band might be preferred. Athletes and outdoor enthusiasts may lean towards silicone, rubber, or fabric bands for their durability and comfort during activities. Consider versatility as well; some bands can be easily swapped to match different outfits or occasions, offering you a range of styles without needing to change your watch.
DIY vs Professional Help: When to Seek Expert Assistance
In the modern era of YouTube tutorials and how-to blogs, the DIY (Do It Yourself) approach has gained considerable traction among those looking to save money or take personal pride in accomplishing tasks independently. However, there are scenarios where seeking professional help can not only save time and frustration but can also ensure safety and warranted quality of work. Understanding when to transition from DIY to professional assistance is critical in making efficient and effective decisions.
Complexity of the Project
One of the primary factors influencing this decision is the complexity of the project. Simple home improvements or repairs, like painting a room or fixing a leaky faucet, might be well within the reach of a competent DIY enthusiast. On the other hand, projects that require specialized knowledge or experience, such as electrical work, plumbing, or structural modifications, generally call for professional intervention. The risk of making a costly mistake or even causing harm makes professional assistance invaluable in these cases.
Required Tools and Resources
Another consideration is the availability of necessary tools and resources. While a DIY approach can often reduce expenditures, the initial cost of acquiring specialized tools or materials can significantly offset these savings. Professionals already possess these resources and can often obtain materials at a lower cost due to industry connections. Additionally, the time investment needed to learn new skills can be considerable, making the DIY route less appealing when efficiency is paramount.


