No se han encontrado productos.
Step-by-Step Guide: How to Replace Your Garmin Watch Band
Replacing the band on your Garmin watch can give it a fresh new look or prolong its life by replacing a worn-out strap. Whether you’re updating your Garmin for aesthetic reasons or practicality, following a simple step-by-step guide will ensure a smooth and successful replacement. This process can vary slightly between different models, but most Garmin watches follow a similar band replacement procedure.
Identify Your Garmin Watch Model
Before purchasing a new band, it’s crucial to know the specific model of your Garmin watch. This information ensures you buy a compatible strap, preventing any issues during the replacement process. Check the back of your watch or its original packaging to find the model number.
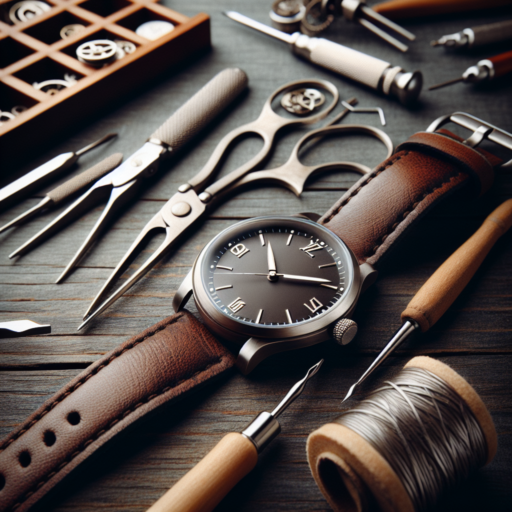
Tools You Might Need
Most Garmin watches require a small screwdriver to remove the screws that hold the band in place. It’s advisable to use the right size to avoid damaging your watch. Some straps come with the necessary tools, so check the package before you start.
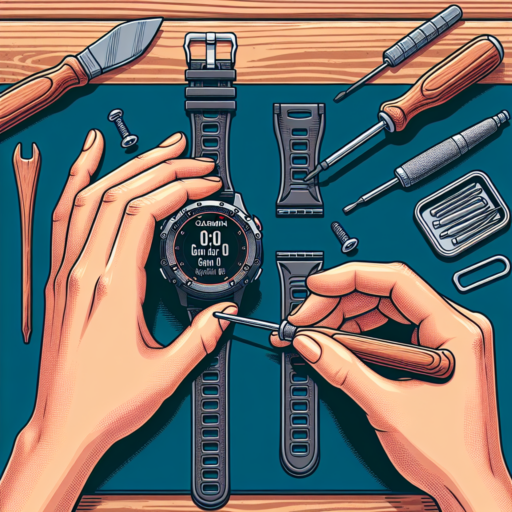
Replacing Your Garmin Watch Band
- Step 1: Turn off your Garmin watch to prevent any accidental activation while changing the band.
- Step 2: Using the correct screwdriver, carefully remove the screws or pins that connect the band to the watch’s body. Keep these small pieces in a safe place, as you will need them to secure the new band.
- Step 3: Once the original band is removed, align the new band with the watch lugs. Make sure it’s correctly oriented before proceeding to the next step.
- Step 4: Secure the new band by reinserting and tightening the screws or pins. Do this gently to avoid damaging the threads or the watch itself.
What Tools Do You Need to Replace a Garmin Watch Band?
Replacing the band on your Garmin watch is a straightforward process that can significantly enhance the look and comfort of your watch. However, to ensure a smooth transition and avoid any potential damage to your watch or the new band, having the right tools on hand is essential. Whether you’re swapping out an old, worn-out band for a fresh one or simply changing the style to match your outfit, knowing what tools are required will make the process seamless and hassle-free.
Required Tools for the Job
To replace a Garmin watch band, you’ll need a few specific tools. Most importantly, a small, precision screwdriver is crucial. This tool will help you to carefully remove the pins that hold the band in place. Additionally, a spring bar tool is highly recommended. This specialised tool is designed to compress and manipulate the spring bars, making it easier to detach the old band and secure the new one. Finally, having a small pair of tweezers can be beneficial for handling the small parts without dropping or losing them.
Optional Accessories
While the tools mentioned above are essential, there are a few optional accessories that can make the process even smoother. For instance, a magnifying glass could come in handy to see the small parts clearly, especially if you’re working in a poorly lit area. A lint-free cloth is also useful to clean the watch and the new band before installation. This ensures that no dust or debris gets trapped, which could potentially affect the comfort or the functionality of the watch.
Whether you’re a seasoned professional or a first-timer, having the right tools and accessories is the first step in ensuring a successful Garmin watch band replacement. Remember, taking your time and working in a well-lit, clean environment will also help in making the process easier and avoiding any unnecessary mishaps.
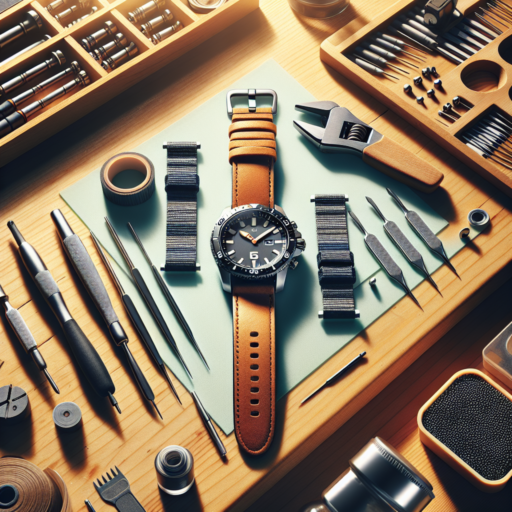
Types of Garmin Watch Bands: Choosing the Right Replacement
When it comes to picking the right replacement band for your Garmin watch, understanding the different types available is crucial. Garmin watch bands come in a variety of materials, styles, and functionalities designed to match your lifestyle and fitness needs. Whether you’re looking to replace a worn-out strap or simply want to customize your watch to better fit your personal style, there’s a diverse range of options to consider.
Silicone Bands
Silicone bands are a popular choice among Garmin watch users due to their flexibility, durability, and comfort. Ideal for everyday wear and all types of physical activities, these bands come in an array of colors and designs. Their water-resistant nature makes them perfect for swimmers or anyone engaged in water sports. Additionally, silicone bands are easy to clean, making them a practical choice for those who lead an active lifestyle.
Leather Bands
For those seeking a more classic or professional look, leather bands are an excellent option. Available in genuine or synthetic varieties, leather bands add a touch of elegance to your Garmin watch, making it suitable for formal occasions or everyday office wear. It’s important to note, however, that leather bands require more care and are not as resistant to water or sweat as silicone or metal options.
Metal Bands
Metal bands, typically crafted from stainless steel or titanium, offer a blend of durability and style. These bands are favored for their sleek, sophisticated appearance that elevates the look of your Garmin watch, making it a natural choice for business events, dinners, or any setting where you’d like to make a statement. Metal bands are also long-lasting, but like leather, they may not be the best choice for high-intensity workouts or water-related activities.
How to Securely Attach Your New Garmin Watch Band
Attaching a new Garmin watch band is a simple process that ensures your device remains securely on your wrist. Whether you are an athlete looking to track your workouts or simply want to keep an eye on your daily activity levels, having your Garmin watch securely fastened is crucial. This guide will walk you through the necessary steps to attach your new Garmin watch band properly.
Step-by-Step Guide to Attaching Your Garmin Watch Band
- Step 1: Start by turning off your Garmin device to prevent any accidental activations.
- Step 2: If your model requires, remove the existing band by pushing the pins or using the tools provided with your watch.
- Step 3: Align the new band with the watch casing ensuring that the pin holes are perfectly lined up.
- Step 4: Carefully insert the pins (or use the quick-fit feature if applicable) to secure the band. You should hear a ‘click’ signaling that the band is locked in place.
After attaching your new band, it’s recommended to give it a gentle tug to confirm that it is indeed securely attached. This precautionary step will give you peace of mind knowing your Garmin watch won’t easily detach and get lost during your activities.
Making sure your Garmin watch band is securely attached not only helps in preventing loss but also ensures accurate activity tracking. A well-fitted band provides better skin contact, enabling more accurate heart rate readings and activity tracking. Keep these steps in mind whenever you’re swapping out your Garmin watch band for a different look or replacing an old one.
Troubleshooting: Common Issues When Replacing Garmin Watch Bands
Replacing the bands on your Garmin watch can refresh its look and extend its lifespan. However, it’s not uncommon to encounter a few hiccups during the replacement process. Understanding these common issues can make the process smoother and ensure your watch is back on your wrist in no time.
Matching the Band Size with Your Garmin Model
One of the first hurdles often encountered is ensuring the replacement band properly fits your Garmin watch model. Each model may have specific band width and attachment styles, which can lead to frustration if not matched precisely. Double-check your Garmin model and the specifications of the replacement band before making a purchase.
Difficulty in Removing the Old Band
Another issue that can arise is difficulty in removing the old band. This can be due to wear and tear or a lack of the proper tools. Using a small screwdriver or the tool provided with your replacement band can ease this process. It’s essential to apply gentle pressure to avoid damaging the pins or the watch itself.
Securing the New Band Properly
Finally, securing the new band properly can also present challenges. Ensuring that the pins are fully engaged and the band is snug against the watch body is crucial for preventing the band from detaching unexpectedly. It may take a couple of tries to get this right, but the effort is well worth the security and comfort of a properly fitted band.
Protecting Your Garmin Watch: Tips for Prolonging Band Life
Your Garmin watch is not just a tool for tracking your daily activities and fitness routines; it is also a stylish accessory that complements your everyday look. However, like all wearable technology, it is susceptible to wear and tear, especially the band which wraps around your wrist day in and day out. To keep your Garmin watch looking and functioning at its best, here are some invaluable tips for prolonging the life of your watch band.
Clean Regularly
One of the simplest yet most effective ways to maintain the condition of your Garmin watch band is by cleaning it regularly. Sweat, dirt, and other particles can accumulate on the band over time, causing it to degrade prematurely. Use a soft, damp cloth to gently wipe down the band, and if necessary, mild soap for more stubborn dirt. Avoid using harsh chemicals or abrasive materials that could damage the band’s material.
Rotate Between Bands
If you wear your Garmin watch daily, consider rotating between different bands. Not only does this prevent excessive wear and tear on a single band, but it also gives you the opportunity to match your band with your outfit or activity. Garmin offers a variety of band materials and designs, from silicone and leather to metal, so you can easily find multiple options to suit your style and usage needs.
Avoiding prolonged exposure to harsh conditions, such as direct sunlight, high temperatures, and water, can also significantly extend the life of your Garmin watch band. Though Garmin bands are designed to be durable, taking additional steps to protect them can ensure they remain in prime condition, enhancing both the functionality and aesthetics of your watch.
Official vs Third-Party Garmin Watch Bands: What to Consider
When it comes to selecting the perfect band for your Garmin watch, the dilemma between official Garmin bands and third-party options is more complex than it initially appears. Each choice offers distinct advantages and potential drawbacks that can affect not just the look, but also the performance and longevity of your watch. In exploring what to consider, it’s essential to weigh both personal preferences and practical aspects.
Quality and Material
The most immediate difference to consider between official and third-party Garmin watch bands lies in the quality and material. Official bands are designed with a high level of commitment to durability and skin compatibility, ensuring they meet the specific standards set by Garmin. Third-party bands, while often more affordable, can vary greatly in quality and material, presenting a gamble in terms of comfort and longevity.
Fit and Compatibility
Another crucial consideration is fit and compatibility. Official Garmin bands offer a guarantee of precise fitment and full compatibility with Garmin watch models, including access to all sensors and features. On the other hand, third-party bands might not have the same quality control, leading to potential issues with sensor access or even causing damage to the watch’s body due to improper fit.
Warranty and Support
Lastly, warranty and support should not be overlooked. Using an official Garmin band ensures that your watch remains fully covered under warranty, providing peace of mind against defects or failures. Venturing into third-party options might put this at risk, as using non-official accessories can sometimes void warranties or leave you without recourse in cases of malfunction.
Maintenance and Care for Your Garmin Watch Band
Caring for your Garmin watch band is crucial to ensure its longevity and maintain its appearance. Over time, dirt, sweat, and other elements can accumulate on the band, leading to wear and tear. Regular maintenance not only keeps your Garmin looking pristine but also ensures comfort during wear. Here’s how to keep your watch band in top condition.
Cleaning Your Garmin Watch Band
To start with, remove your watch band from the watch face if possible. Use a soft, lint-free cloth slightly dampened with fresh water to gently wipe away any dirt or stains. For silicone bands, a mild soap solution can be used for a deeper clean. Ensure the band is completely dry before reattaching it to the watch face to avoid moisture damage.
Daily Care Tips
- Avoid exposing your watch band to direct sunlight for prolonged periods to prevent discoloration.
- When not in use, store your Garmin in a cool, dry place away from direct heat sources.
- Avoid the use of harsh chemicals, cleaning solvents, or strong detergents to clean the band.
Following these simple maintenance and care steps can significantly extend the life of your Garmin watch band. Regular cleaning coupled with mindful storage and handling ensures that your Garmin remains a sleek and functional accessory for all your adventures.
FAQs: Answers to Common Questions About Replacing Garmin Watch Bands
Replacing the band on your Garmin watch is a straightforward process that many users find themselves needing at some point, either due to wear and tear or simply desiring a new look. While the task is generally simple, there are often questions that arise regarding compatibility, tools needed, and the steps involved. Below, we’ll address some of the most common inquiries to help you through the process seamlessly.
What tools do I need to replace my Garmin watch band?
Most Garmin watches require a small screwdriver to remove the pins that hold the band in place. The specific type can vary, but a Phillips #00 screwdriver is a common tool needed. In some cases, your replacement band might come with the necessary tools, including a pin removal tool, making the process even easier. It’s essential to check what’s included with your new band or the original packaging of your watch to ensure you have everything you need before starting.
Are all Garmin watch bands interchangeable?
Not all Garmin watch bands are interchangeable. Compatibility depends on the model and size of your Garmin watch. Each series and model has specific band sizes and connection mechanisms, so it’s important to verify that the replacement band you’re considering is designed for your specific watch model. Garmin’s official website and authorized resellers often provide a compatibility list or tool to help you find the right band for your model. This is crucial to avoid purchasing a band that won’t fit your watch.
Understanding these key aspects of replacing Garmin watch bands can help ensure a smooth and successful upgrade to your wearable tech. Remember to always verify compatibility before purchase and to have the right tools on hand for the replacement process.