How to put LED light in pairing mode?
Putting your LED light into pairing mode is a crucial step for connecting it to a control app on your smartphone or to a home automation system. It allows you to control your lighting setup remotely, offering convenience and flexibility in managing your home’s ambiance. The process involves a series of simple steps that vary slightly depending on the brand and model of your LED light.
Step-by-Step Guide to Activate Pairing Mode
Firstly, ensure that your LED light is compatible with the device or app you’re trying to connect it with. Most modern LED lights support Bluetooth or WiFi connectivity, but it’s essential to confirm this beforehand. Once compatibility is confirmed, power on your LED light and keep it within the range of your smartphone or home automation system. The typical range for Bluetooth connections is about 10 meters (33 feet) without obstructions.
For most LED lights, activating pairing mode requires you to turn the light off and on a specific number of times, usually three to five times in quick succession. Ensure you follow your LED light’s manual for the exact procedure since the required sequence may vary. After performing this step, your light should blink or flash, indicating that it’s now in pairing mode and ready to connect to your device.
Lastly, open the control app on your smartphone or device and select the option to add a new light. The app should automatically detect your LED light in pairing mode. If it doesn’t, ensure that your phone’s Bluetooth or WiFi is turned on and that you’re within the required range. Upon successful detection, follow the in-app instructions to finalize the connection.
No se han encontrado productos.
How do you connect LED lights to WiFi?
Connecting LED lights to WiFi has become an increasingly popular way to enhance smart home setups, allowing for remote control and automation of lighting. This process, while it might seem daunting at first, can be straightforward if you follow a few essential steps.
Step 1: Ensure Your LED Lights are WiFi-Compatible
Before endeavoring to connect your LED lights to your WiFi network, it’s crucial to confirm that your lights are indeed WiFi-capable. Many LED lights are designed for smart home setups and will clearly state their WiFi compatibility on the product packaging or in the user manual. If you’re uncertain, check the product specifications on the manufacturer’s website.
Step 2: Download the Appropriate App
Most WiFi-enabled LED lights require the use of a manufacturer-specific app for initial setup. This app will guide you through the process of connecting your lights to your WiFi network. Search for the app name provided in your product’s manual in the App Store (for iOS devices) or Google Play Store (for Android devices), and install it on your smartphone or tablet.
Step 3: Connect Your LED Lights to WiFi
After installing the application, open it and create an account if required. The app will then prompt you to add a new device — select your LED lights from the list. Ensure your phone is connected to your WiFi network and enter your WiFi credentials when prompted. Follow the in-app instructions carefully to finalize the connection. Depending on your product, you might need to enter the lights into a «pairing mode,» often done by turning the lights off and on a specific number of times.
By following these steps, you can seamlessly integrate LED lights into your WiFi network, enabling you to control them remotely via your smartphone or through voice commands using smart home assistants. Keep in mind that the exact steps may vary slightly depending on the brand and model of your LED lights, so referring to the manufacturer’s instructions is always recommended.
How to connect two sets of LED lights together?
Connecting two sets of LED lights together can seem daunting, but with the right approach, it’s a straightforward process. Whether you’re aiming to enhance the ambiance of your living space or add extra illumination for a project, linking LED lights can amplify the effect. This endeavor requires minimal tools and a basic understanding of how LED circuits operate. Let’s dive into the essentials of connecting LED lights seamlessly.
Choosing Compatible LED Lights
Before attempting to connect two sets of LED lights, it’s crucial to ensure they are compatible. Look for LED strips or bulbs that have similar voltage and power requirements. Mismatched sets could result in uneven lighting or, worse, damage the LEDs. Compatibility extends to the connectors as well; using the same brand or type of lights can simplify this aspect.
Methods of Connection
There are primarily two methods to connect LED lights: using connectors or soldering. Connectors are ideal for beginners and offer a straightforward, solder-less option. They come in various forms, such as strip-to-strip or strip-to-power source connectors. On the other hand, soldering provides a more permanent solution and is preferable for a secure connection, especially in installations where the lights will remain in place for an extended period.
Regardless of the method chosen, following the manufacturer’s instructions is paramount. Ensuring a solid and safe connection will not only extend the lifespan of your LED lights but also prevent potential electrical issues. Remember, working with electricity demands caution, so consider consulting with or hiring a professional if you’re unsure about the process.
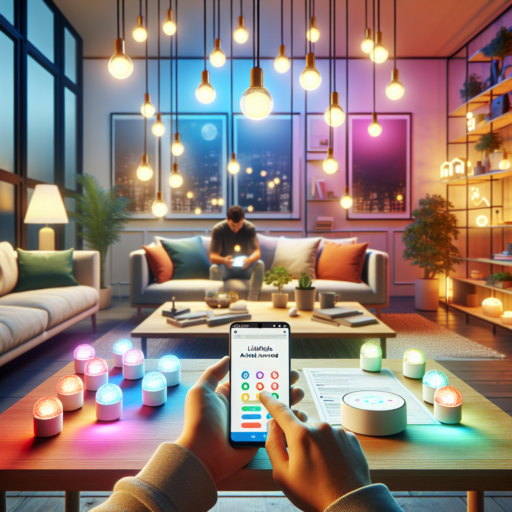
How do you connect your phone to your LED lights?
Connecting your phone to LED lights can transform the ambiance of any room, adding a touch of personalization and control over your environment. The process generally involves a smartphone, the LED lights equipped with smart technology, and potentially an app designed by the manufacturer. This seamless integration can be achieved in a few straightforward steps, ensuring that anyone can enjoy the dynamic and customizable lighting experience that smart LEDs offer.
Step 1: Ensure Your LED Lights are Smart
Firstly, it’s crucial to verify that your LED lights are ‘smart.’ This means they should be capable of connecting to your phone, usually via Bluetooth or Wi-Fi. Most modern LED light strips or bulbs come with this functionality but double-checking the specifications is a wise move. These smart LEDs often need a specific app to enable full functionality, which brings us to the next step.
Step 2: Download the Appropriate App
Once you’ve confirmed that your LED lights are compatible with smartphone connectivity, the next step is to download the official app. Brands like Philips Hue, LIFX, and Govee offer free apps on both the Apple App Store and Google Play Store. Installing the app not only facilitates the connection between your phone and the LED lights but also unlocks a suite of features such as color changing, scheduling, and scene selection.
Step 3: Connect and Customize
With the app installed on your smartphone, you’ll follow its instructions to connect to your LED lights. This typically involves selecting your LED lights within the app, sometimes requiring you to enter a code or press a button on the LED device itself. Once connected, you can use your phone to control the lights’ color, brightness, and patterns, truly customizing your space to match your mood or the occasion.