What does a bra strap bracelet mean?
The bra strap bracelet is a unique fashion statement that has been seen on the wrists of many trendsetters and fashion enthusiasts. This intriguing concept of reusing an otherwise hidden element of lingerie as a visible accessory invites curiosity and discussions about its significance. Wearing a bra strap bracelet can symbolize several things, from innovative recycling ideas to making bold fashion choices. It mirrors the evolving trends in fashion where functionality and aesthetics blend seamlessly.
At its core, the bra strap bracelet is a testament to the creativity in accessory fashion. It represents a move towards sustainable fashion practices by repurposing an item that would otherwise remain unseen or be discarded. This accessory encourages individuals to think outside the box and find beauty in the most unexpected places. It’s a subtle nod to the idea that fashion has no boundaries and that every element of our wardrobe can be transformed into something new and exciting.
Moreover, embracing the bra strap bracelet can also be seen as a statement of empowerment and body positivity. It challenges traditional norms around lingerie and its place in society. By bringing a typically intimate piece into the public eye in a non-conventional way, wearers may express their comfort with their bodies and their defiance against societal expectations. This bold fashion choice serves as a conversation starter, opening up dialogues about individuality, self-expression, and the dismantling of outdated fashion «rules».
No se han encontrado productos.
How do you clasp a bra strap?
Mastering the skill of clasping a bra strap can seem daunting at first, but with some practice, it becomes as easy as tying your shoes. The process may vary slightly depending on the design of the bra, but the basic steps are universally applicable. Understanding the mechanics behind the hook-and-eye closure will assist you in securing your bra comfortably and efficiently.
Step-by-Step Guide to Fastening a Bra Strap
To begin, hold the bra by the end of the straps, ensuring the hooks are in your dominant hand. Lean forward slightly, allowing your breasts to fall naturally into the cups. Wrap the bra around your chest, just under your shoulder blades, where it sits most comfortably. At this point, the clasps should be at the back of your body. Use your other hand to hold one end of the bra in place while you bring the hooks towards the eyelets on the opposite end.
Next, align the hooks with the eyelets, starting from the bottom hook. Once you have the hooks and eyes lined up, gently fasten each hook into its corresponding eyelet. It’s important to start from the bottom to ensure a secure and even closure. If your bra has multiple hooks, continue securing each one, moving upwards. After you have all the hooks clasped, adjust the straps if necessary to ensure a snug, but comfortable fit. Remember, the bra should fit firmly around your body without causing discomfort or leaving marks on your skin.
For those who find it challenging to clasp a bra at the back, there is also the method of clasping the bra in the front, then rotating it around your body until the clasps are at the back, and finally pulling the bra up and placing your arms through the straps. This technique might be easier for beginners or for those with limited mobility. Whether you’re a novice or just looking to refine your technique, practicing these steps will help you master the art of clasping a bra strap with ease and confidence.
How do you tie a strap bracelet?
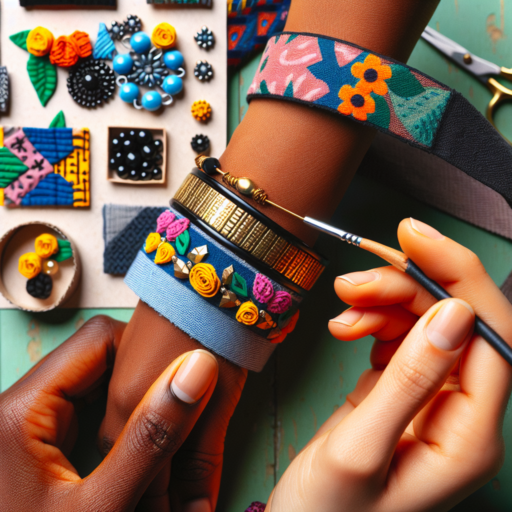
Tying a strap bracelet is a simple process that can significantly enhance the way it looks and feels on your wrist. Whether you have a leather strap, cloth, or any other material, knowing the right technique is key. This guide will walk you through easy-to-follow steps to ensure your bracelet is securely and stylishly tied.
Preparing the Strap Bracelet
Before tying your strap bracelet, ensure it’s clean and free from any damage. A well-maintained bracelet not only looks better but will also make the tying process smoother. Lay the bracelet flat on a surface to inspect its length and condition, making adjustments as necessary to fit your wrist comfortably.
Step-by-Step Guide to Tying
Start by wrapping the bracelet around your wrist to gauge the desired tightness. It should be snug but not so tight that it restricts movement or circulation. Once you’ve found the perfect fit, hold the end of the strap in one hand and the rest of the bracelet in the other. Create a simple knot by looping the end under and then over the other part of the bracelet. Pull the end through the created loop and tighten to secure the bracelet in place. For bracelets with a buckle, insert the pin into the appropriate hole on the strap, then secure the buckle.
How do you tighten a bra bracelet?
If you’re noticing that your bra bracelet, or the band that wraps around your body, has become a bit too loose for comfort, there are some simple yet effective ways to adjust it for a better fit. First, it’s important to understand that the life of a bra, and its firmness, can diminish over time due to wear and tear. Tightening the bracelet can ensure better support and enhance the garment’s longevity.
Check the Hook and Eye Closure
The most straightforward method to tighten your bra bracelet involves adjusting the hook and eye closure. Most bras come with three or more sets of hooks and eyes, which allow for a customizable fit. If your bra bracelet feels loose, simply fasten the hooks on a tighter set of eyes. This minor adjustment can make a significant difference in how securely your bra fits.
Adjust the Shoulder Straps
Another method to achieve a tighter bra bracelet involves the shoulder straps. Over time, these straps can stretch out, contributing to a looser fit around the chest. By shortening the straps, you effectively pull the band tighter around your body, ensuring a snug fit. However, it’s crucial to adjust both straps equally to maintain the bra’s balance and optimal support.
Regularly checking and adjusting your bra’s fit is key to ensuring maximum comfort and support. By utilizing these simple techniques, you can significantly extend the wearable life of your bras and enjoy a better-fitting garment. Remember, a well-fitting bra not only feels better but also enhances the overall appearance of your outfits.