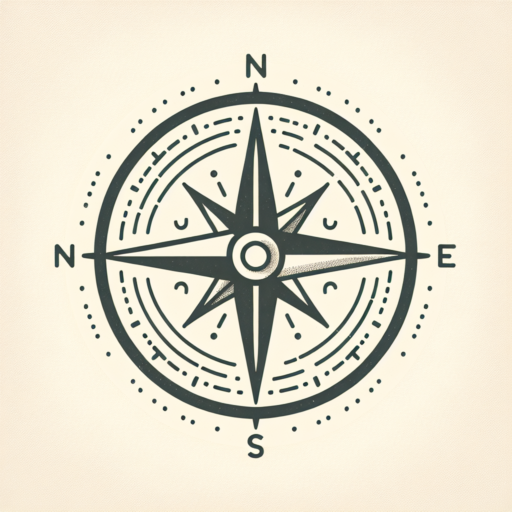
How do you draw a simple compass rose?
Drawing a simple compass rose is a fundamental skill for navigators, artists, and cartography enthusiasts. It symbolizes direction, guiding users in maps and nautical charts with elegance and clarity. This guide walks you through the straightforward steps to create your own basic compass rose, a task manageable even for beginners.
Start by sketching a cross on your paper to establish the cardinal directions: North (N), South (S), East (E), and West (W). It’s essential to accurately align these directions; consider using a ruler for straight lines and precision. Each line of the cross represents a cardinal direction, serving as the backbone of your compass rose. Make sure these initial lines are light, as they will guide the subsequent steps and may need to be adjusted or erased.
Next, add the intermediate directions — Northeast (NE), Southeast (SE), Northwest (NW), and Southwest (SW) — by drawing another set of lines at a 45-degree angle between the primary lines. These intermediate lines bridge the gap between the cardinal directions, providing more detailed guidance on orientation. If you wish, you can embellish your compass rose by drawing small arrows at the ends of each line, pointing outward to symbolize the outward spread of directions from the center.
Finally, enhance your compass rose by adding decorative elements such as petals or fleurs-de-lis at the end of each directional line. These embellishments not only beautify your compass rose but also historically signify royalty and were often used in medieval compass designs. The addition of such decorative features transforms your simple compass rose into a piece of art, ready to complement any map or navigational chart.
How to draw a simple compass?
Drawing a simple compass can serve as a fundamental skill for various artistic or navigational projects. The process can be straightforward, yet it requires attention to detail to ensure accuracy and symmetry. Here, we discuss the basic steps to create a simplified version of a compass, perfect for beginners or anyone in need of a quick guide.
Materials Needed
- Paper or any drawing surface
- A pencil
- A ruler or any straight edge
- A compass (the drawing tool)
To start, ensure you have a clear and comfortable workspace. Position your paper securely and gather your tools within reach. Starting with the center of your compass, use your drawing compass to make a light but clear circle. This circle will serve as the base of your compass needle.
Sketching the Compass Outline
With the circle in place, the next step involves drawing the cardinal points. Imagine your circle divided into four equal parts or use a ruler to be more precise. Mark these points lightly as North (N), South (S), East (E), and West (W). Connecting these points will give your compass a basic direction. Using a ruler, draw straight lines from one cardinal point to its opposite, ensuring they intersect neatly at the circle’s center. This step creates a clear guide for further detailing.
No se han encontrado productos.
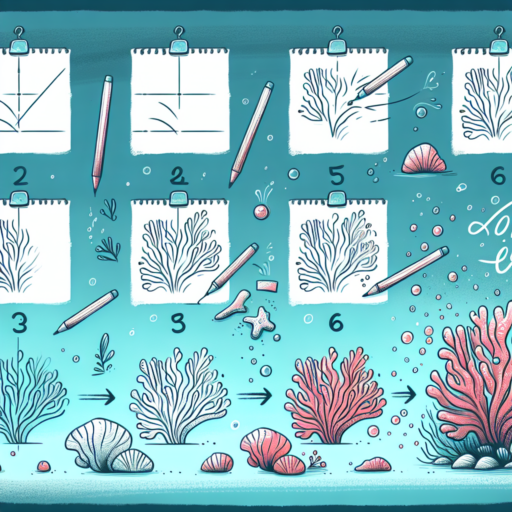
How do I draw a rose step by step for beginners?
Drawing a rose can seem complex due to its intricate petals and unique shape, but with the right guidance, beginners can tackle this subject with confidence. Break down the process into simple, manageable steps to make drawing a rose less daunting. It all starts with understanding the basic shapes that form the foundation of the rose and progressively adding layers to these foundations.
Step 1: Sketch the Basic Outline
Begin with a small circle to represent the inner bud of the rose. This circle serves as the central point around which the petals will wrap. From this circle, draw a spiral line that moves outward; this will guide the structure of the petals. Understanding the spiral growth of petals is crucial in capturing the natural beauty of a rose. Keep your lines light, as you will refine them as the drawing progresses.
Step 2: Add Petal Shapes
Start adding petal shapes to the spiral guideline. First petals are more tightly wrapped around the bud, so they appear smaller and more compact. As you move away from the center, the petals become larger and more open. Remember, rose petals have a soft, wavy edge, so avoid drawing straight, rigid lines. To create a realistic appearance, vary the size and curvature of each petal. This step is about building the layers and complexity of the rose, so take your time to adjust the petal shapes as needed.
Step 3: Refine and Add Details
Once the basic petal shapes are in place, refine the edges and add details such as curves and veins to bring your rose to life. At this point, you can start erasing the initial spiral guideline, focusing on defining and darkening the outlines of your petals. Adding depth through shading can also enhance the dimensional quality of your rose. Focus on the areas where shadows naturally occur, like the base of the petals and where they overlap. Remember, practice is key; don’t be discouraged if your first attempts aren’t perfect. Each drawing will improve your understanding and ability to capture the essence of a rose.
What is compass rose for kids?
A compass rose is a symbol that has been a part of navigation and maps for centuries. It is designed to illustrate the orientation of the cardinal directions—North, East, South, and West—on a map, helping explorers and travelers to find their way. For kids, understanding the compass rose can be both fun and educational, as it combines basic geography with the excitement of exploration.
The compass rose has its roots in early navigational history when sailors relied on the stars and the wind to guide their journeys across uncharted waters. The symbol is typically drawn as a circle divided into four or more sections, each labeled with the direction it points to. The most critical points, North, East, South, and West, are known as the cardinal directions, and they are usually marked with their respective initial: N, E, S, W. Sometimes, the compass rose will also include the intercardinal directions—Northeast, Southeast, Southwest, and Northwest—providing a more detailed guide to direction.
Teaching kids about the compass rose not only introduces them to basic navigation skills but also encourages them to think about the world in a broader context. By understanding how to read a compass rose, children can improve their map-reading abilities, an invaluable skill in both educational and real-world settings. Additionally, learning about the compass rose can spark an interest in geography, history, and the many cultures that have contributed to our understanding of the world.
For kids, the compass rose is more than just a tool for orientation; it’s a gateway to adventure, inviting them to explore the world around them with confidence and curiosity. Whether they’re reading about the voyages of famous explorers, playing treasure hunt games, or simply finding their way in a city park, the compass rose can be a constant companion, guiding their steps and expanding their horizons.