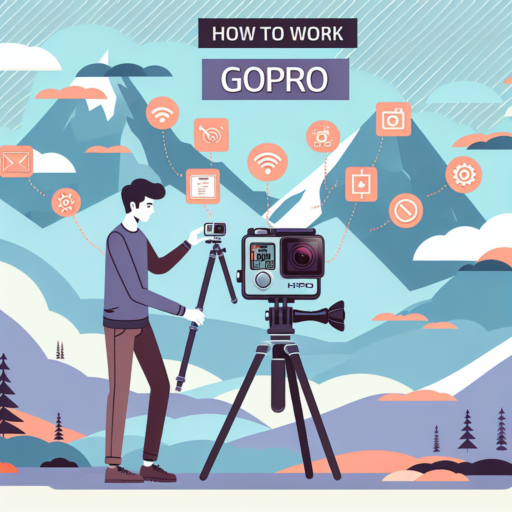
How does the GoPro camera work?
The GoPro camera operates on a basic yet effective principle designed to capture high-quality video and photos in extreme conditions and environments. At its core, a GoPro camera combines a compact, rugged form factor with a powerful image sensor and a wide-angle lens, enabling users to document their adventures from a thrilling perspective. The magic begins when you power on the device.
Wide-Angle Lens and Image Sensor
The heart of the GoPro’s functionality lies in its wide-angle lens and high-resolution image sensor. This combination allows for the capture of broad vistas and dynamic action shots with striking clarity. When the camera is turned on, the sensor starts converting light into digital signals, which the GoPro’s processor then translates into the images and videos that users love. The wide-angle aspect ensures that users can record expansive scenes without having to constantly reposition the camera.
User-Friendly Interface and Modes
GoPro cameras are renowned for their user-friendly interface, which facilitates quick and easy navigation through various shooting modes and settings. From breathtaking 4K videos to stunning time-lapse sequences, users can select the mode that best fits their current venture with just a few taps on the camera’s buttons or screen. This adaptability makes GoPros ideal for capturing a wide range of activities, from surfing waves to scaling mountains.
Ultimately, the GoPro camera achieves its remarkable performance through a blend of advanced technology and user-centric design. Whether strapped to a helmet zooming down a mountain bike trail or affixed to a surfboard tackling towering waves, a GoPro captures the essence of the moment with unparalleled ease and efficiency. Its working principle, centered around simplicity and capability, ensures that adventurers can focus on their pursuits without worrying about the integrity of their captured memories.
How do I start my GoPro camera?
Getting your GoPro camera up and running is an exciting moment, but it can also be a little daunting if you’re not familiar with it. The process is straightforward, ensuring you can quickly start capturing your thrilling adventures. The first step is to make sure your GoPro is fully charged. Use the USB cable provided in your kit to charge it, and you’ll see the red indicator lights turn on, signaling that it’s charging. Once fully charged, these lights will go off, indicating it’s time to power on your device and dive into the GoPro world.
Powering On Your GoPro
To turn on your GoPro, simply press the ‘Mode’ button located on the side of the camera. This button serves multiple purposes, including changing the camera mode and turning the device on or off. A short press will bring your GoPro to life, greeted by the beeping sound and the GoPro logo on the display. It’s essential to wait a few moments as your GoPro initializes. If it’s your first time powering on the device, you might be prompted to set the date and time, ensuring your footage is accurately timestamped.
Setting Up The Basics
Before you start capturing footage, it’s worth taking a moment to familiarize yourself with the basic settings. Navigate through the menu using the ‘Mode’ button to cycle through options and the ‘Shutter’ button to select. Here, you can adjust settings such as video resolution, frame rate, and field of view. It’s a good idea to experiment with different settings to see what works best for your type of adventure. Remember, the higher the resolution, the more memory your footage will use, so ensure to have a memory card with ample space installed.
No se han encontrado productos.
Is it easy to use a GoPro?
Exploring the ease of use of a GoPro camera reveals that these compact devices are designed with user-friendliness in mind. For novices and professionals alike, GoPro has streamlined the process of capturing high-quality videos and images. The intuitive user interface and straightforward controls are among the first aspects users notice. GoPros boast a small form factor, but they’re mighty in performance, making them a top pick for adventurers and everyday users seeking reliability and simplicity in their photography sessions.
One of the standout features of GoPro cameras is their versatility. Whether mounted on a helmet while biking through rugged terrains, strapped to your chest during a skydiving adventure, or simply held in hand during a family gathering, GoPros continue to perform exceptionally. The ease of switching between modes, from high-definition video recording to capturing stunning stills, is simplified with user-friendly buttons and on-screen prompts. This seamless transition ensures that even users with minimal technical expertise can capture professional-grade footage without missing a beat.
The GoPro’s mobile app adds another layer of convenience, transforming the user experience into something even more straightforward and accessible. Through this app, users can control their GoPro remotely, change settings, preview shots, and even edit their footage on the go. This integration of hardware with intuitive software exemplifies how GoPro is tailored for ease of use, catering to the needs of today’s fast-paced, content-driven society.
How do you take a video with a GoPro?
Taking a video with a GoPro can transform your adventures into shareable memories and cinematic stories. Whether you’re capturing the rush of a downhill bike ride or the serene beauty of a mountain climb, understanding the essential steps to video recording with your GoPro is crucial. Here’s how to get started, ensuring every frame of your journey is captured with clarity and dynamism.
Step 1: Setting up Your GoPro
First, ensure your GoPro is charged, and a compatible SD card is inserted. Power on your device by pressing the mode button, then navigate through the menu using the same button to select the ‘Video’ mode. This mode is specifically designed for video recording, offering various resolution and frame rate options to best suit your activities. Optimal settings, like 1080p at 60fps, provide a good balance between high-definition quality and smooth motion, ideal for most action-packed adventures.
Step 2: Choosing the Right Mount and Accessories
Equipping your GoPro with the appropriate mount and accessories is vital for capturing steady and engaging footage. For hands-free operation, consider using a head strap or chest mount. These options are perfect for POV (Point Of View) shots, adding an immersive feel to your videos. For more static shots, a tripod or a GoPro stick can offer stability and a range of shooting angles. Always ensure your mounts are securely fastened to prevent any mishaps during recording.
Step 3: Recording Your Video
With your GoPro set and mounted, you’re ready to start recording. Holding your GoPro, frame your shot by looking at the preview on the LCD screen or via the GoPro app on your smartphone. When you’re happy with the framing, begin recording by pressing the shutter/record button. Keep your movements smooth for best results. Remember, experimenting with different angles and perspectives can yield unique and captivating footage. To stop recording, simply press the shutter/record button again.