How do I set the time on a timer?
Setting the time on a timer is a fundamental skill that can greatly assist in managing daily tasks, cooking, exercise, and countless other timed activities. Whether you’re using a traditional mechanical timer or a digital one, the process typically involves a few simple steps. However, the specifics can vary based on the type of timer you’re employing. It’s important to familiarize yourself with the device’s particular design and functionality to ensure accuracy and efficiency.
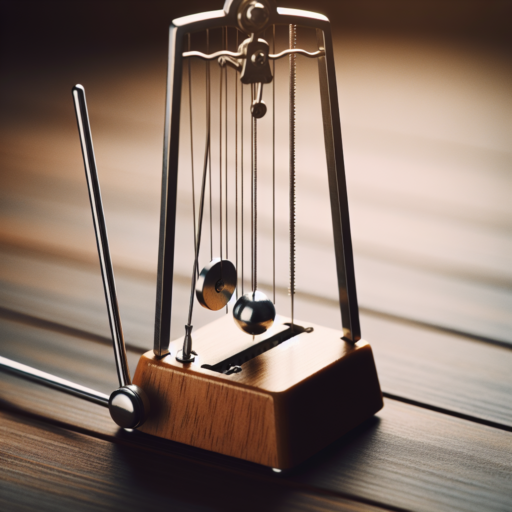
For Mechanical Timers
To set a mechanical timer, which often features a dial, the process is quite straightforward. Begin by turning the dial clockwise to the 60-minute mark or the maximum time limit to «wind up» the timer mechanism. This action ensures that the timer has enough energy to properly count down. Next, turn the dial back to the desired time. Some models emit a clicking sound as you set the time, providing audible feedback. Once set, the timer will count down until it reaches zero, usually signaling the end with a ringing sound.
For Digital Timers
Digital timers, on the other hand, offer a bit more flexibility and precision but require a different approach. First, locate the «set» or «timer» button, which is the initial step to programming the time. Pressing this button may bring up the option to select hours, minutes, and sometimes seconds. Using the plus (+) and minus (-) buttons or a keypad, input the desired time. Confirm your setting by pressing the «start» button, which may also sometimes be labeled as «OK» or «enter». Remember to check the timer’s display to ensure your input time is correct.
Regardless of the type of timer you are using, paying attention to the initial setup and ensuring the device is fully functional are key components to successful time management. Properly setting your timer not only helps in accurately measuring time but also enhances the effectiveness of your tasks, making it an essential skill in both personal and professional settings.
How to set up a timer plug?
Setting up a timer plug is an efficient way to manage your appliances, ensuring they turn on and off at specific times, which can help save energy and reduce bills. The process is straightforward but requires attention to detail to ensure everything works seamlessly. Whether you’re looking to control lighting, heating, or other household devices, mastering the setup process is essential.
The first step in setting up a timer plug is choosing the right model for your needs. Consider the type of appliance you are connecting, as some timers have a maximum load capacity. Once you have selected the appropriate timer plug, it’s time to program it. Start by plugging the timer into an electrical outlet, then insert the plug of the appliance you wish to control into the timer. Most models have a digital interface where you can set the current time followed by your desired on and off times. It’s crucial to follow the manufacturer’s instructions closely during this phase to ensure accuracy.
For those who prefer a more hands-on approach, some timer plugs come with manual dials. These types often require you to push down segments around a dial to set the operating times. Each segment typically represents a 15-minute interval, giving you the flexibility to customize your appliance’s operating schedule. After setting the times, make sure the timer is switched to the «Timer» mode rather than «Manual» mode, which bypasses the timer function allowing the appliance to stay on continuously.
Maintaining your timer plug is also an important aspect to consider. Regularly check the settings to ensure they are still relevant to your needs, especially with the change of seasons or daylight saving adjustments. Revising your setup periodically can further enhance energy efficiency and ensure your appliances operate only when needed.
No se han encontrado productos.
How to set a light timer?
Setting a light timer can seem daunting at first, but with the right guidance, it turns into a surprisingly straightforward task. Whether you’re looking to reduce your energy bills, enhance your home security, or simply make your daily routine more convenient, mastering the art of timer setup is key.
Step-by-Step Instructions
Start by choosing the right type of light timer for your needs. The most common types are digital and mechanical, each with its own setting method. For digital timers, you’ll typically need to press a program button, set the current time, then choose your desired on and off times. Mechanical timers often involve pulling up or pressing down on tabs or pins at your specific on and off times.
Always make sure your timer is plugged into a power source, and if it’s a plug-in model, ensure the light or device you want to control is correctly connected to the timer. If setting up outdoor lighting, choosing a timer that’s weatherproof and suitable for external use is crucial.
Common Mistakes to Avoid
- Overloading: Don’t plug too many devices into a single timer, as it can cause overheating or even a fire hazard.
- Incorrect Timing: Double-check the AM/PM settings when programming your timer to prevent your lights from turning on and off at the wrong times of the day.
- Forgetting Battery Backup: For digital timers, a battery backup is essential for maintaining your settings during a power outage.
Where is the timer on my Android?
Finding the timer on your Android device is straightforward. Android gadgets come with a clock app pre-installed, which includes the timer function among others like the alarm and stopwatch. To locate the timer, simply open your device’s Clock app. Inside, you will find the Timer tab, usually at the bottom or top of the screen depending on your device’s model and software version.
The clock app’s interface is user-friendly, allowing you to set the timer duration with ease. You can adjust hours, minutes, and even seconds by tapping on the respective fields. After setting the desired time, hit the ‘Start’ button to initiate the countdown. The app runs in the background, so you can continue using your phone for other tasks while the timer counts down.
In addition to the basic timer functionality, some Android devices offer advanced features such as setting your favorite tune for the timer alarm or saving commonly used timers for easy access in the future. These features enhance the usability of the timer, making it a handy tool for a variety of tasks like cooking, exercising, or even timing your study sessions.
For users who cannot find the timer function or prefer an alternative, the Google Play Store provides numerous third-party apps designed to meet a wide range of timing needs. These apps often come with added functionalities not available in the default clock app, including customizable themes, interval timers, and more.